Showing posts with label workshop. Show all posts

Thursday, May 16, 2013

The Pinterest DIY age - creative space ideas

You've heard of the Stone Age, you've heard of the Bronze Age you've probably heard of the Technology Age. Sure we all manage to pick up a factoid or two in school.
I'm thinking right now may be the Pinterest Age (!) The age of DIY, recycling and getting really crafty with everything. Even your sandwiches have to be designed 'just so' and be mini pieces of culinary and decorative art.

So it's no surprise that I went all Pinterest on my studio : the DIY version of going kung fu on its a$$. I spent a few months scouring Pinterest for some ideas. Some I did adapt. I want to share some of these handy ideas as hey... who doesn't love handy tips?!

Exhibit A: my scissors organiser. I had a couple of mug racks going wanting so I used one for regular scissors (i have an assortment of paper, double sided tape, ribbon scissors) and the other for my fancy edged scissors.
You can pick these up in the euro/dollar store. A very cheap idea.

Scissors organisers 
Exhibit B: seed bead storage - very serious stuff. This is where I did splash out a bit as I looked at different storage ideas. And they were all expensive. A large unit with small drawers sounded perfect but they cost upwards of 200 here even for basic ones. So I thought 'A4 paper drawers!' they aren't exactly a cheap option but they do the job perfectly. I have them organised by colour and they are easily accessible. I got mine from an office supply store but this is one thing you may have in your home office or may find in a skip from an office having a clear out (never underestimate the power of The Skip you can find real gems in them!).

seed bead storage
Exhibit C: Bead storage for my large beads. I really didn't want to spend a lot but did need something practical. I was in the euro store one day when I spotted a drawer unit and a lightbulb went off in my head. These were just 2 euro each (less than 2 US dollars).

Bead storage (the black units)
Exhibit D: somewhere for my tools. This was a suggestion of my dads: magnetic strips like the ones in the kitchen for utensils. It's very handy for the tools I use most. I keep the rest on a tall bathroom rack I had. The great thing is I can keep other larger tools in the baskets (solder fluid etc).

Tools area
Some other ideas you'll see in the pictures:
Using little buckets on the wall, they come off and are attached to a little strip on the wall (they're popular in mechanics workplaces etc).
Using a cupcake stand (I have spare silicone cupcake liners on it as the paper ones would not last) for bits n bobs left over from projects that come in handy.
Large plastic bins under the counters for packing materials, paper scraps, wool, tools etc. A great way to keep out damp too.
I screwed plastic flip boards to the wall by the seating areas so i can jot down ideas (and remove the paper easily).
Huge bread bin for my stringing materials and wire. It keeps them dry too.

I recently posted useful tips:
Useful trolly tip
Bead mat DIY
Tool tip


Monday, April 15, 2013

Sanctuary of mine

My work-space is my crafty sanctuary.
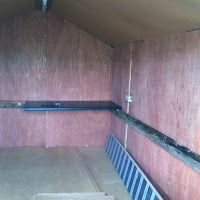
I've been making cards for about 10 years and jewellery for about 8. I used to have a small garden shed we converted for me when my enormous amount of craft stash threatened to take over the house in it's bid for world domination.
When I began, I started out as most of us do: crafting on the kitchen table.

old studio
My little shed was great at first but after a few years I had even more tools when you factored in my jewellery making as well. Glitter gets in everything, it was such a small space that I would never try to make jewellery out there.


So, I dreamt of a space big enough for a jewellery counter and a craft station - with storage too. It was a bit of a pipe dream.
Eventually I realised I would one day need more space to get around in so perhaps this pipe dream should be more than a dream.

work in progress
I scouted around for custom made sheds, work sheds and insulated workshops but even the most basic one (not that big) was quite pricey and definitely a bit out of budget! So I took my mam's suggestion to look at secondhand shed options as my dad is a DIY avocado. I stumbled across a nice 13 x 8 on Gumtree - a very sturdy one made with shipping timber.


My personal DIY expert said he could insulate it and put in counters etc.
So I bought insulation, plywood, weathershield etc. My uncle John told us his workplace was had a load of kitchen units and wood going into the skip during a big clear out, so I got a large table and shiny kitchen counters plus a large shelf unit that my dad cut in half and was absolutely perfect for my rubber stamps.

It would take time to work on it as he was working alone but dad loves a project. I kept an eye out for cheap storage in the euro store although I did splash out a bit on units for my seed beads!


Finally 4 months after buying the shed and 10 years after starting out with a glue stick I was able to move in. I had to add rain gutters after a heavy rain, it's just that big. It also still looks like it did when I set everything up! Except I did get a swivel chair for my birthday and stuck an oil heater in there (brrrr).


Etsy shop